

Anyone who has had a bad reaction to a new cream knows the feeling: a few days of redness, itching or burning, and a half-used jar in the bin. A simple home test can often catch the problem early. This guide explains how to patch test skincare at home, step by step, what the result means, and what brands should say about patch testing on their labels and leaflets.
Contents
- The short answer
- Why patch test at all?
- Step-by-step: the home patch test
- What counts as a positive result?
- What a home patch test cannot tell you
- Mistakes to avoid
- Special cases
- If you are a brand: what to tell your customers
- How the lab version differs
- A quick checklist for consumers
- Frequently asked questions
- Key takeaways
The short answer
To patch test a new skincare product at home, apply a small amount to a coin-sized spot on the inner forearm or the bend of the elbow, leave it on, repeat once or twice a day as the product is normally used, and watch the spot for several days. Dermatology guidance, such as that of the American Academy of Dermatology, suggests about seven to ten days of application. If redness, itching, swelling, burning, bumps or blisters appear, wash the area and stop using the product.
Why patch test at all?
Skin reacts to cosmetics in two main ways. Irritant reactions are direct damage from a product or an ingredient and often show up within hours: stinging, redness, dryness. Allergic reactions are immune responses that can take a day or two, sometimes longer, to appear after contact: itchy, red, sometimes swollen or blistered skin. Testing on a small, hidden area lets you find out without a reaction on your face. Cosmetics are safety-assessed before sale in the EU, but safe for the population does not mean suitable for every individual, so the home test remains a practical precaution.
Read also Patch Test Volunteers: How Many Are Needed?
Step-by-step: the home patch test
The graphic gives the five steps at a glance; here is the detail.
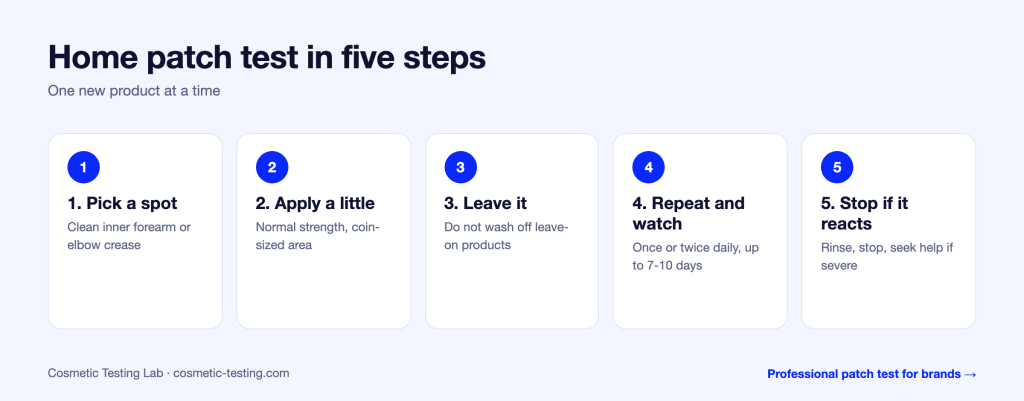
- Choose the spot. Pick an area with thin, clean skin that will not be rubbed or washed straight away, such as the inner forearm or the crease of the elbow. Avoid broken, sunburnt or already irritated skin.
- Apply a small amount. Use the product at normal strength, about the amount you would use on the face for the same area. Do not dilute it, because the test should reflect real use.
- Leave it on. For leave-on products, let it absorb and do not wash the spot. For cleansers and other rinse-off products, leave it on for the time the label recommends, for example a minute or a few, then rinse.
- Repeat and watch. Reapply once or twice a day, as you would use the product, and check the spot every day. Some guidance suggests seven to ten days, because delayed reactions can show up after the first 24–48 hours. Use one new product at a time so you can tell which one is responsible.
- Judge the result. No redness, itch, swelling or bumps over the test period is a good sign. Any reaction means: wash gently with water, stop the product and do not use it on the face.
What counts as a positive result?
- Redness that persists or spreads.
- Itching, burning or stinging that does not settle after a short time.
- Bumps, scaling, dry patches or small blisters.
- Swelling around the test spot.
Mild, brief warmth right after applying some actives, for example an exfoliating acid, may be expected, but if you are unsure, treat it as a reaction and stop. If a reaction is severe, spreads, or involves swelling of the face or lips or breathing difficulty, seek medical help immediately.
What a home patch test cannot tell you
A home test is a sensible first check, not a medical test. Facial skin, especially around the eyes, can react differently from forearm skin. A clear spot does not guarantee that the product will never cause an allergy later, because allergy can develop after repeated use over weeks or months. And it cannot replace a clinical patch test: when a dermatologist suspects contact allergy, they apply standardised allergens to the back under a patch for a couple of days, and read the result over several visits. If you have repeated or unexplained reactions to cosmetics, ask your doctor about referral rather than guessing at the cause.
Read also What Is a Cosmetic Patch Test (and Is It Required)?
Mistakes to avoid
- Testing several new products together, so you cannot tell which one reacted.
- Testing on skin that is already inflamed.
- Stopping after one day when delayed reactions are possible.
- Washing the spot immediately after applying a leave-on product.
- Assuming that “natural” products are safe to skip the test. Plant extracts and essential oils are common triggers.
- Ignoring a mild reaction because it “will settle”.
Special cases
Active products such as retinoids, exfoliating acids and vitamin C can cause irritation that is not an allergy. Many dermatologists advise introducing them gradually, even after a clear patch test. People with eczema, rosacea or a history of contact allergy should be especially careful and may wish to seek advice before trying new products. For babies and young children, ask a paediatrician or pharmacist, and choose products specifically intended for them.

If you are a brand: what to tell your customers
Many brands put a patch test recommendation on the pack or in the leaflet, and that is helpful. Keep these points in mind:
- Do not present the home test as proof of safety. Your safety evidence is the CPSR and the data behind it.
- Keep the instruction simple: where, how much, how long and what to do if a reaction appears.
- Check the warnings the regulation requires for your product type; the cosmetics regulation requires certain precautions to appear on the label.
- Describe your own testing accurately. A professional patch test on volunteers is a very different thing from a home check by the consumer.
Read also Patch Test Cost for Cosmetics and How Long It Takes
How the lab version differs
When a brand tests its product, the aim is to check skin tolerance before launch with volunteers, a defined protocol and a report you can file. Our patch test is a single 48-hour occlusive patch test with a signed PDF report, taking about two weeks in total, and it can support the product file and your safety assessment. It checks irritation under controlled conditions, so you start from evidence and not from customers’ first reactions. The stability test and microbiological test complete the picture, because a product that degrades or is contaminated can irritate skin even when its recipe is gentle.
A quick checklist for consumers
- Read the ingredient list and avoid anything you know you react to.
- Test one new product at a time.
- Use a small area of clean, healthy skin.
- Apply as you would normally use it.
- Check every day for up to a week or more.
- Stop at the first sign of a reaction.
- Keep the packaging so you can note the batch and ingredients if you need advice.
Frequently asked questions
How long should I wait after a home patch test?
Many guides suggest a day or two, but dermatology advice for new skincare is closer to a week or longer, since delayed reactions are possible. The longer you test, the more reliable the result.
Is behind the ear a good place to test?
The inner arm or elbow crease is the common recommendation. Behind the ear is also used, but facial skin may behave differently, so a clear result is only an indication.
Can I patch test make-up and sunscreen the same way?
Yes, with the same steps. For sunscreens, remember that a patch test does not tell you about photo-reactions, which happen only when the skin is exposed to light.
Key takeaways
- Test one new product at a time on a small area of the inner arm or elbow.
- Apply it as you normally would and watch for several days, up to a week or more.
- Stop at the first sign of redness, itching, swelling or blisters, and seek help if severe.
- A home test is a precaution, not proof of safety; brands need professional testing and a safety assessment.